TCI Customer Web
Site F.A.Q.
�P Quotes and Orders Entry
- Entering Quotes

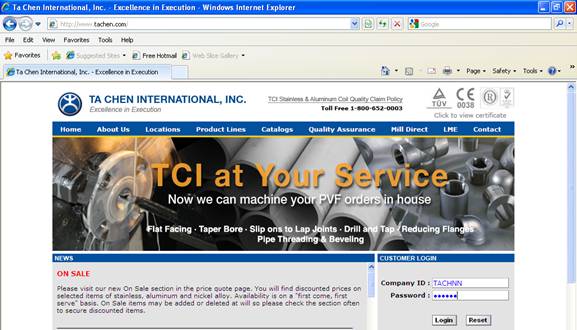
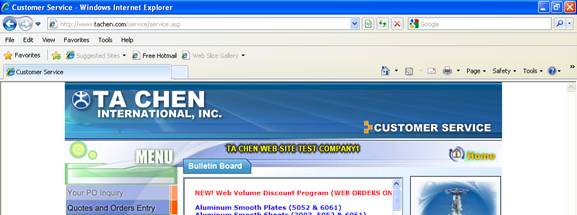
�P Enter your company ID and passwords in the fields provided.
- If you are not already set up as an internet customer, please contact one of our friendly sales staff and they will gladly assist you in creating your internet account.
�P Hit the ��Login�� button.
![]()
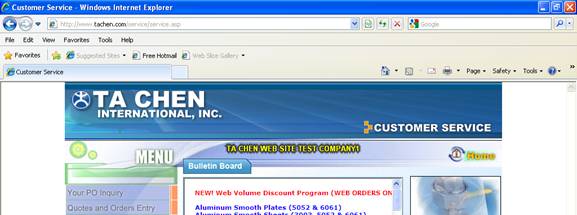
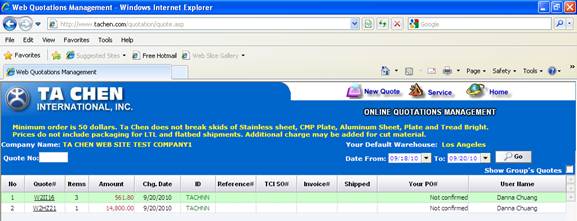
�P Go to ��Your PO Inquiry��.
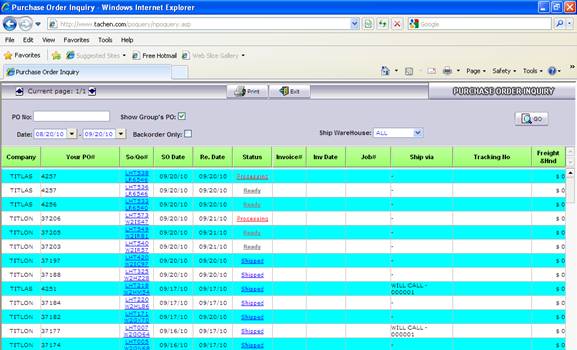
�P Select the appropriate date range.
�P
If there is more than one branch of your company,
and you would like to view the information for ALL customer numbers within your
group, check the ��Show Group��s PO�� option.
�P Hit ��GO��.
�P The information displayed on the screen will show all shipped and pending order information for your account between the dates specified.
![]()
![]()
![]()
![]()
![]()
![]()
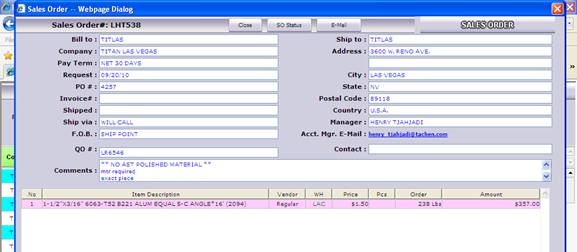
�P Left-click on the sales order number to see the sales order details.
�P Click on ��Close�� to go back to the previous screen.
�P Click on ��SO Status�� to see the current status of the sales order.
�P Click on ��E-Mail�� to E-Mail a copy of the sales order information.
![]()
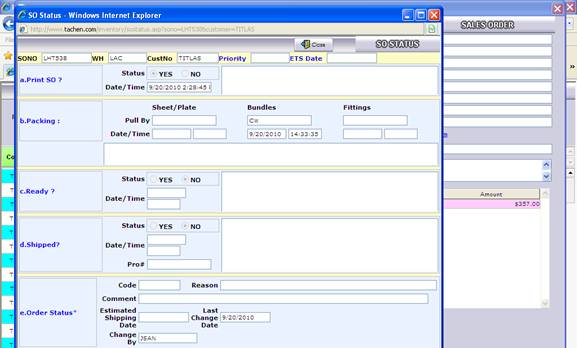
�P If you click on ��SO Status��, the system will show any packing, ready, shipped, and order status information.
�P Hit the ��Close�� button to go back to the sales order details.
![]()
![]()
![]()
![]()
![]()
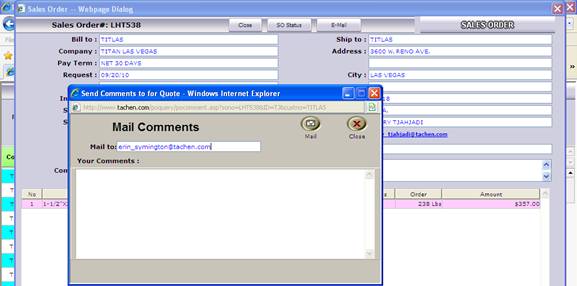
�P If you click on ��E-Mail��, a new window will be displayed.
�P Change the E-Mail address, if need be.
�P Enter any comments in the field provided.
�P Hit the ��Mail�� button.
![]()
![]()
![]()
![]()

�P The system will state the E-Mail has been sent successfully.
�P Hit ��OK��.
�P Hit the ��Close�� button to return to the previous page (see the next page for an example of the E-Mail that is sent).
![]()
![]()
![]()
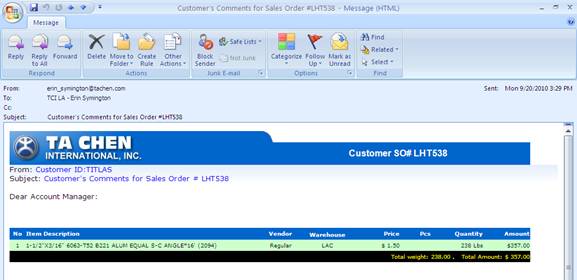
�P E-Mail example
![]()
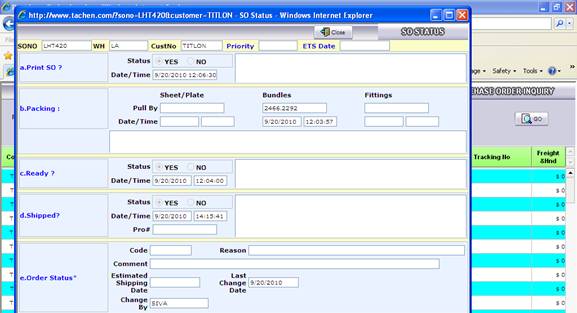
�P Left-click on the status to see the current status of the sales order.
�P Hit the ��Close�� button to go back to the previous screen.
![]()
![]()
![]()
![]()
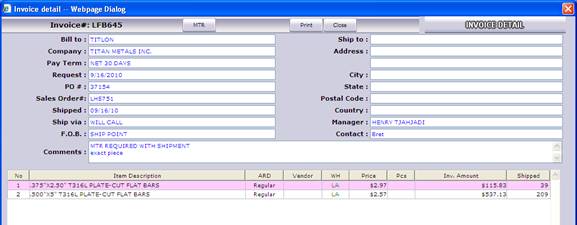
�P Left-click on invoice number to see the invoice details.
�P Hit the ��MTR�� button to receive print copies of the corresponding mill test reports.
�P Hit the ��Print�� button to print a copy of the invoice information.
�P Hit the ��Close�� button to return to the previous screen.
![]()
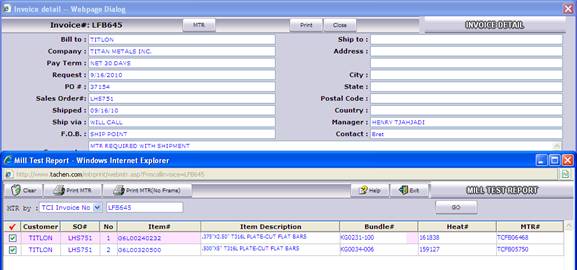
�P If you click on the ��MTR�� button, a new window will be displayed.
�P Change the ��MTR by�� option to TCI INVOICE NO.
�P Enter the invoice number in the field provided.
�P Hit ��GO��.
�P The item information will display on the screen.
�P Any line with a check mark in the first column will print the mill test report.
�P Choose to print the MTR with or without a frame (see further instructions in the section labeled ��REQUEST MILL TEST REPORT��).

![]()
![]()
![]()
![]()
![]()
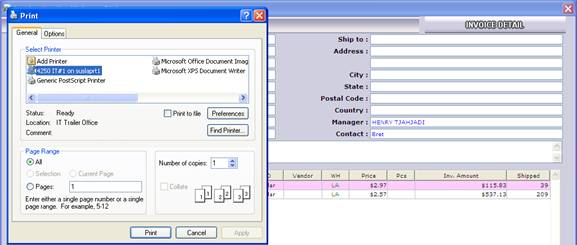
�P If you click on the ��Print�� button, the system will display a new window.
�P Choose the appropriate printer from the list provided.
�P Hit the ��Print�� button.
![]()
![]()

�P Left-click on any tracking numbers to be brought to the carrier��s web site to receive the current shipping/delivery information.
QUOTES AND ORDERS ENTRY �V ENTERING NON
BULK QUOTES
![]()
�P To enter a new quote, go to ��Quotes and Orders Entry��.
![]()
�P Choose ��New Quote��.
![]()
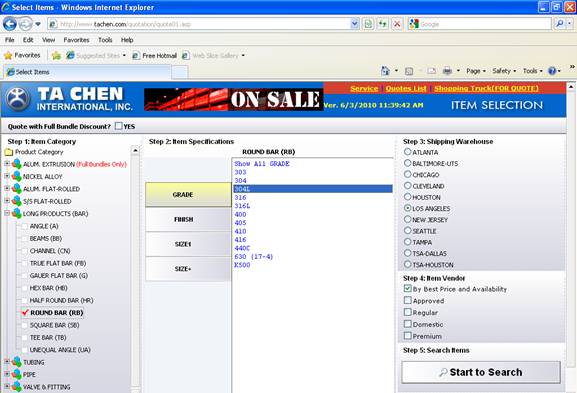
�P Select the item category from the list provided.
�P The system will then display the necessary item specifications to select.
- To see all specifications, choose ��Show All��.
- To see more than one specification, highlight the first selection, then while holding the ��Ctrl�� button, highlight the additional specifications.
�P The system will default to show your primary warehouse as the shipping warehouse, so change if need be.
�P The system is defaulted to show stock based on best price and availability, so change if need be.
�P After all information has been selected, hit the ��Start to Search�� button.

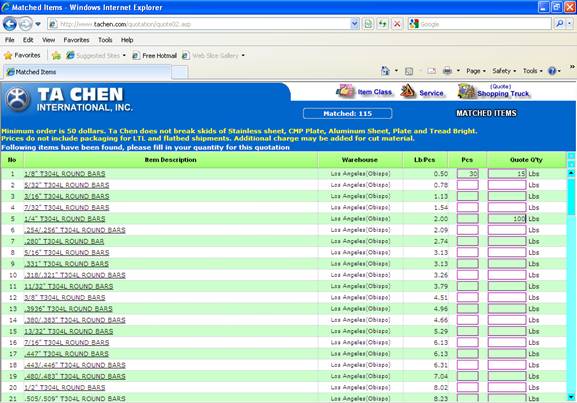
�P On the list of matched items, enter the quote quantity in the fields provided (only for those items you want on the quote/order).
- If you enter a piece count, the system will calculate an estimate order quantity
�P After all quote quantities have been entered, hit the ��Shopping Truck�� button.

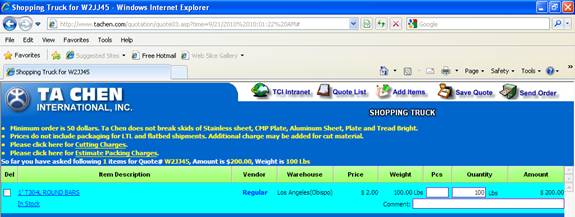
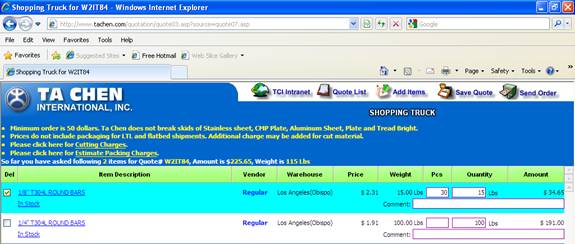
�P If the full amount of requested material is in stock, the system will state ��In Stock�� as the availability.
�P The system will also calculate a price based on your pricing policy.
�P Make any changes to the piece count and/or quantity.
�P Enter any comment pertaining to the line item in the field provided.
![]()

�P If the full amount of requested material is out of stock, but a substitute item is available, the system will state the substitute information.
- Since the material is out of stock, the system will not calculate a selling price
�P Click on ��In Stock�� to change to the substitute item.
![]()

�P The system will automatically state the quote quantity in the original warehouse.
�P To change the warehouse, remove the quantity from the original warehouse, then enter the quantity in a new warehouse.
�P To save the information, hit ��OK��.
- To go back and not make any changes, hit ��Cancel��.
![]()

�P If you choose ��OK��, the system will ask if you are sure you want to make the changes to this quote.
- Choose ��OK�� to make the changes
- Choose ��Cancel�� to go back
![]()
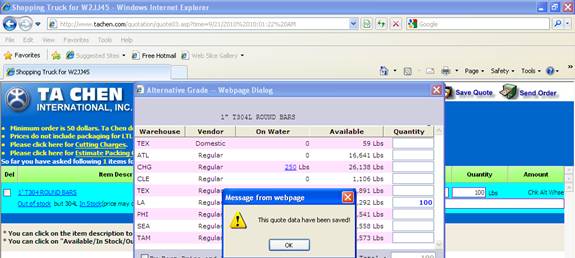
�P If you choose ��OK�� to make the changes, the system will state the quote data has been saved.
�P Hit ��OK��.
�P The system will then change the item code, state the availability, and calculate a selling price.
�P Enter any comment pertaining to the line item in the field provided.
![]()
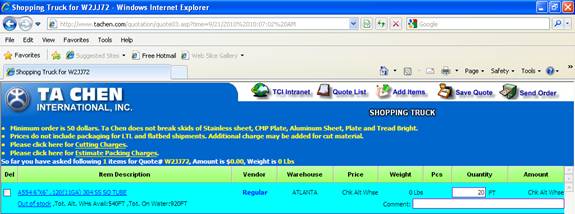
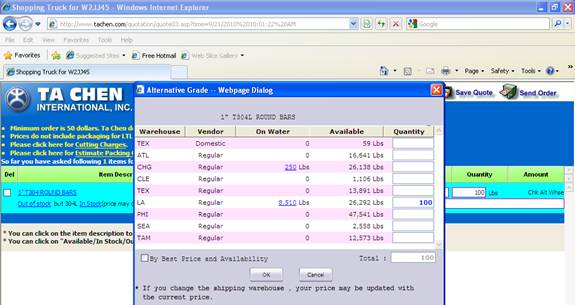
�P If the full amount of requested material is not in stock in the requested warehouse, the system will state ��Out of stock�� as the availability.
- Since the material is out of stock, the system will not calculate a selling price
�P If material is available in other warehouses, the system will state the total alternative warehouse available amount.
�P If material is on water, the system will state the total on warehouse amount.
�P Click on ��Out of Stock�� to change to an alternative warehouse.
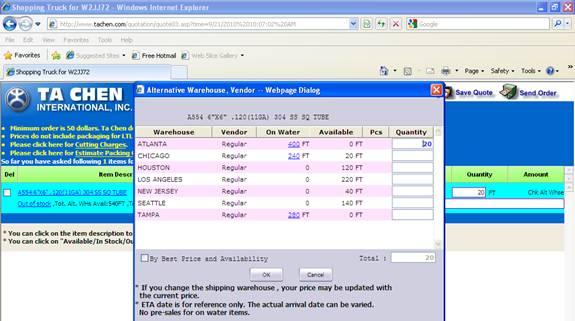
�P The system will automatically state the quote quantity in the original warehouse.
![]()


�P To change the warehouse, remove the quantity from the original warehouse, then enter the quantity in a new warehouse.
�P To save the information, hit ��OK��.
- To go back and not make any changes, hit ��Cancel��.
![]()
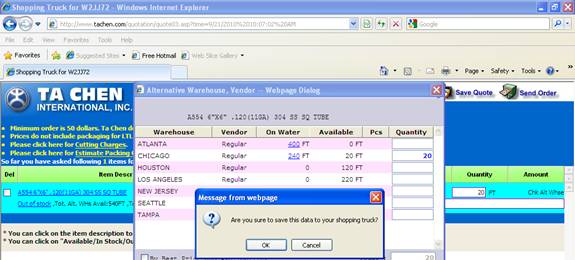
�P If you choose ��OK��, the system will ask if you are sure you want to make the changes to this quote.
- Choose ��OK�� to make the changes
- Choose ��Cancel�� to go back
![]()

�P If you choose ��OK�� to make the changes, the system will state the quote data has been saved.
�P Hit ��OK��.
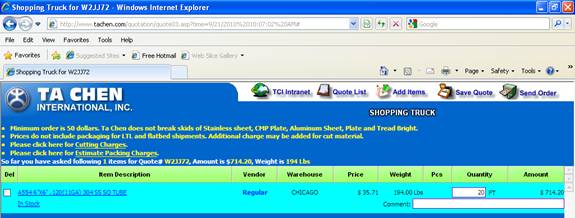
�P The system will then change the warehouse, state the availability, and calculate a selling price.
�P Enter any comment pertaining to the line item in the field provided.
![]()

�P If the full amount of material is completely out of stock in all warehouses, the system will state ��Out of stock�� as the availability.
- The total alternative warehouse amount will be 0 pounds
- The total on warehouse amount will be 0 pounds
�P Because the item is out of stock, the system will not calculate a selling price.
![]()
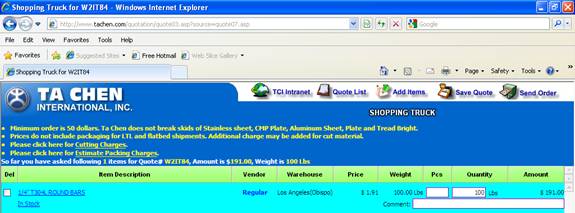
�P If you would like to delete an item from a quote, place a check mark in the ��Del�� field.
�P When you choose ��Save Quote�� or ��Send Order��, the system will automatically remove the selected line item.
![]()
�P After all item information has been selected/entered, you can choose to save the quote or send the order.
�P To save the information as a quote only, choose ��Save Quote��.
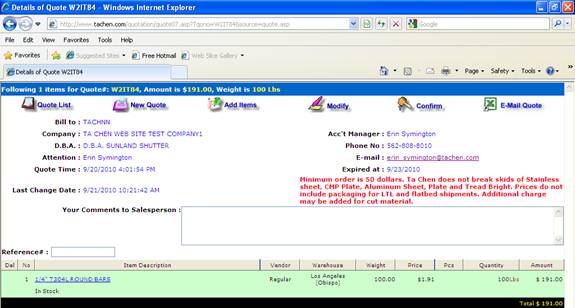
�P The system will then show you an overview of the quote (please note the expiration date).
�P If you choose ��Quote List��, the system will take you back to the list of quotes.
�P If you choose ��New Quote��, the system will take you to the item selection screen in order to create a new quote.
�P If you choose ��Add Items��, the system will take you to the item selection screen in order to add more items.
�P If you choose ��Modify��, the system will take you back to the Shopping Truck in order to make changes to the current item information.
�P If you choose ��Confirm��, the system will take you to the confirmation page.
�P If you choose ��E-Mail Quote��, the system will pop up a new screen which will allow you to E-Mail the information as an Excel file.
�P You can also click on the account manager��s E-Mail address to open a new E-Mail.
QUOTES AND ORDERS ENTRY �V ENTERING BULK QUOTES
![]()
�P To enter a new quote, go to ��Quotes and Orders Entry��.
![]()
�P Choose ��New Quote��.
![]()
![]()
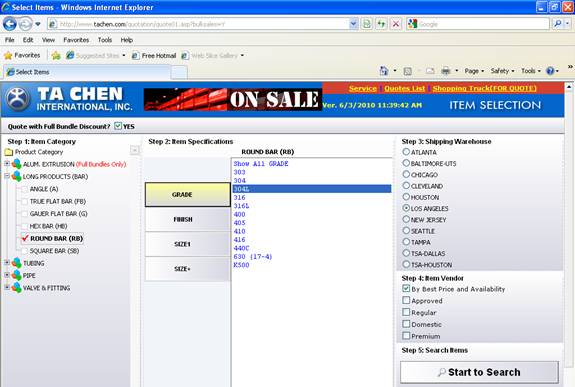
�P Select ��Quote with Full Bundle Discount��.
�P Select the item category from the list provided.
�P The system will then display the necessary item specifications to select.
- To see all specifications, choose ��Show All��.
- To see more than one specification, highlight the first selection, then while holding the ��Ctrl�� button, highlight the additional specifications.
�P The system will default to show your primary warehouse as the shipping warehouse, so change if need be.
�P The system is defaulted to show stock based on best price and availability, so change if need be.
�P After all information has been selected, hit the ��Start to Search�� button.

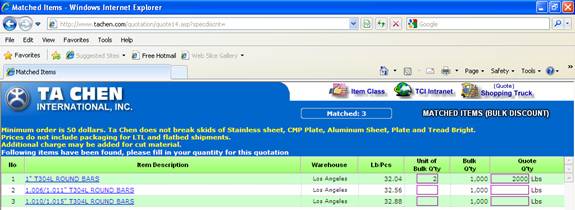
�P Enter the unit of bulk quantity (multiple) in the field provided.
- The system will automatically calculate the quote quantity
�P After all quantities have been entered, hit the ��Shopping Truck�� button.
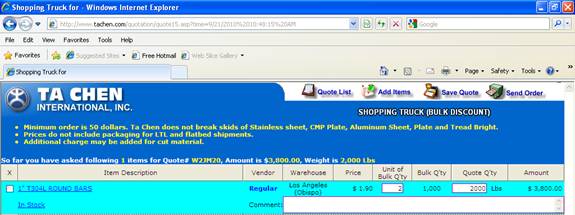
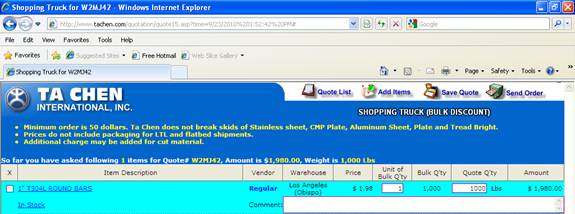
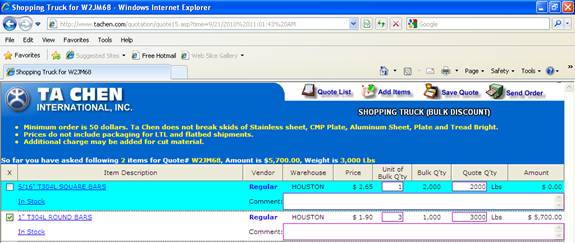
�P If the full amount of requested material is in stock, the system will state ��In Stock�� as the availability.
�P The system will also calculate a price based on your pricing policy.
�P Make any changes to the unit of bulk quantity.
�P Enter any comment pertaining to the line item in the field provided.

�P If the full amount of requested material is out of stock, but a substitute item is available, the system will state the substitute information.
- Since the material is out of stock, the system will not calculate a selling price
�P Click on ��In Stock�� to change to the substitute item.

![]()
�P The system will automatically state the quote quantity in the original warehouse.
�P To change the item, enter the unit of bulk quantity in the field provided.
- The system will automatically calculate the quote quantity.
�P To save the information, hit ��OK��.
- To go back and not make any changes, hit ��Cancel��.
![]()
�P If you choose ��OK��, the system will ask if you are sure you want to make the changes to this quote.
- Choose ��OK�� to make the changes
- Choose ��Cancel�� to go back
![]()
�P If you choose ��OK�� to make the changes, the system will state the quote data has been saved.
�P Hit ��OK��.
�P The system will then change the item code, state the availability, and calculate a selling price.
�P Enter any comment pertaining to the line item in the field provided.

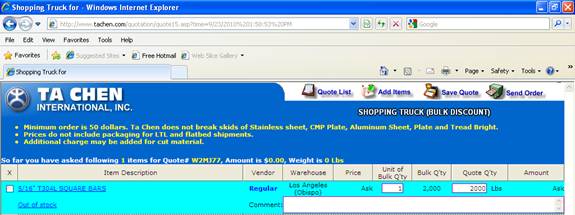
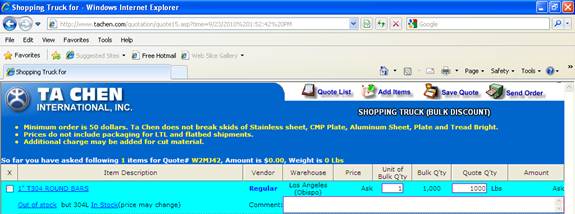
�P If the full amount of requested material is not in stock in the requested warehouse, the system will state ��Out of stock�� as the availability.
- Since the material is out of stock, the system will not calculate a selling price
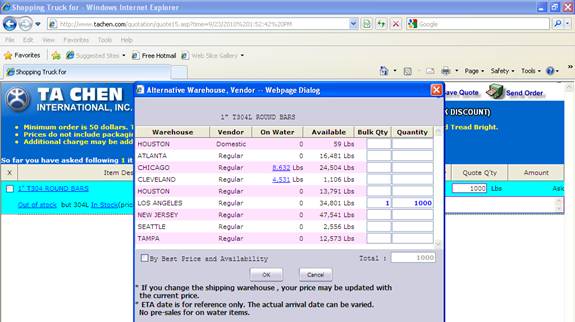
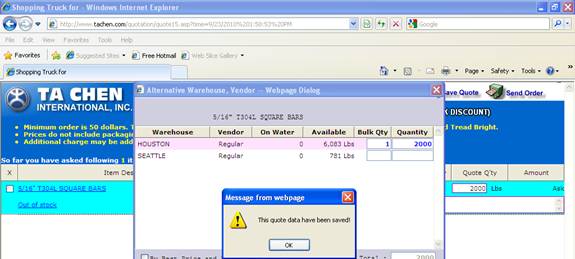
�P Click on ��Out of Stock�� to see if the material is available in an alternative warehouse.
![]()
![]()
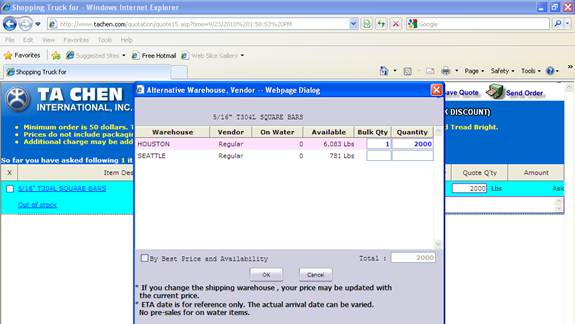
�P To change to an alternative warehouse, enter the bulk quantity in the field provided.
- The system will automatically calculate the quote quantity.
�P To save the information, hit ��OK��.
- To go back and not make any changes, hit ��Cancel��
![]()
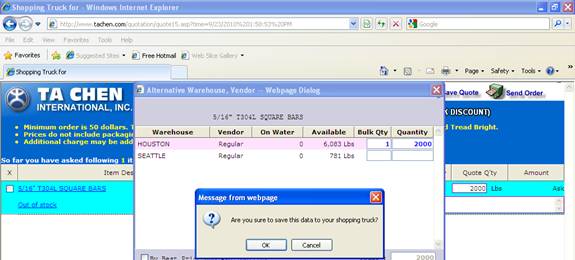
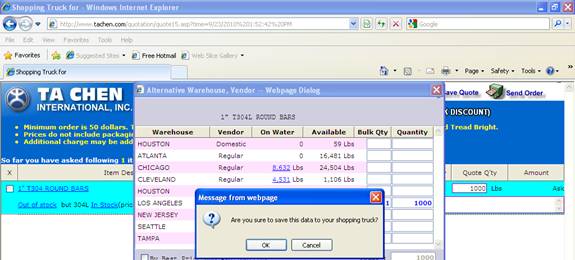
�P If you choose ��OK��, the system will ask if you are sure you want to make the changes to this quote.
- Choose ��OK�� to make the changes
- Choose ��Cancel�� to go back
![]()
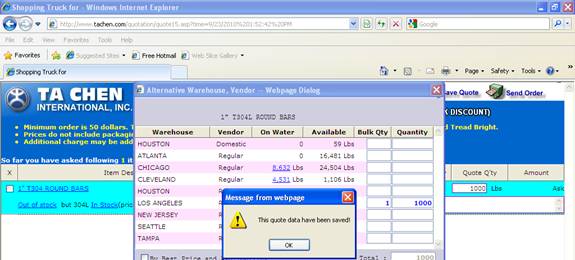
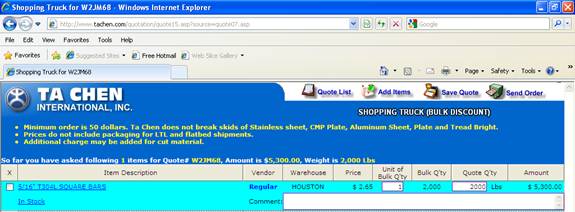
�P If you choose ��OK�� to make the changes, the system will state the quote data has been saved.
�P Hit ��OK��.
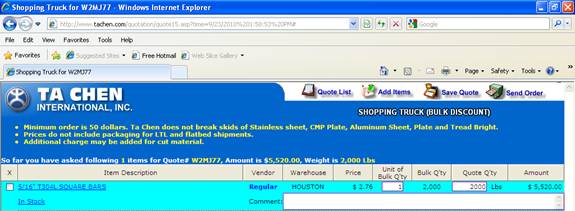
�P The system will then change the warehouse, state the availability, and calculate a selling price.
�P Enter any comment pertaining to the line item in the field provided.
![]()
�P If you would like to delete an item from a quote, place a check mark in the ��Del�� field.
�P When you choose ��Save Quote�� or ��Send Order��, the system will automatically remove the selected line item.
![]()
�P After all item information has been selected/entered, you can choose to save the quote or send the order.
�P To save the information as a quote only, choose ��Save Quote��.

�P The system will then show you an overview of the quote (please note the expiration date).
�P If you choose ��Quote List��, the system will take you back to the list of quotes.
�P If you choose ��New Quote��, the system will take you to the item selection screen in order to create a new quote.
�P If you choose ��Add Items��, the system will take you to the item selection screen in order to add more items.
�P If you choose ��Modify��, the system will take you back to the Shopping Truck in order to make changes to the current item information.
�P If you choose ��Confirm��, the system will take you to the confirmation page.
�P If you choose ��E-Mail Quote��, the system will pop up a new screen which will allow you to E-Mail the information as an Excel file.
�P You can also click on the account manager��s E-Mail address to open a new E-Mail.
![]()
![]()
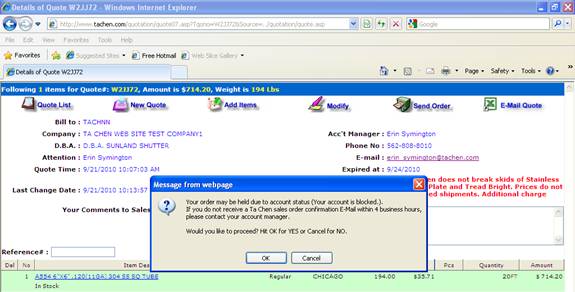
�P If you choose ��Send Order�� (to confirm the quote) and your account is blocked, the system will state a warning that your order may be held.
- If you choose ��OK��, the system will take you to the confirmation page
- If you choose ��Cancel��, the system will take you back to the quote list
![]()
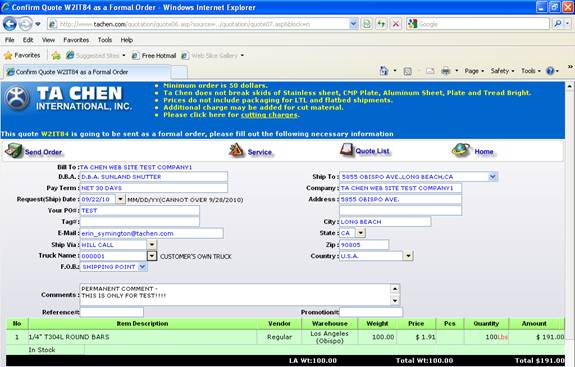
�P To confirm the quote, choose ��Confirm��.
�P Enter the following information in the fields provided:
- Choose the requested SHIPPING date from the calendar
�� If you choose the current date, the system will ask if you are sure you want the material to ship today
- Purchase order number
- Tag number (if applicable)
- Choose the ship via from the drop list provided
- If a trucking company is not automatically stated, choose the trucking company from the drop list provided
- Choose the FOB from the drop list provided
- If the material is shipping via any method of UPS and the FOB is ��Collect�� or ��3rd Party��, enter the UPS account number in the field provided
�P The system is set up to display the default shipping address.
- If the material is shipping to another address on file, choose the shipping address from the drop list provided.
- If the material is shipping to an address that is not on file, choose ��DROP SHIP�� as the ship to information, and manually enter the address information
�P After all information has been entered, hit the ��Send Order�� button.
- If any important information is missing, the system will state a warning and will not allow you to send the order
![]()
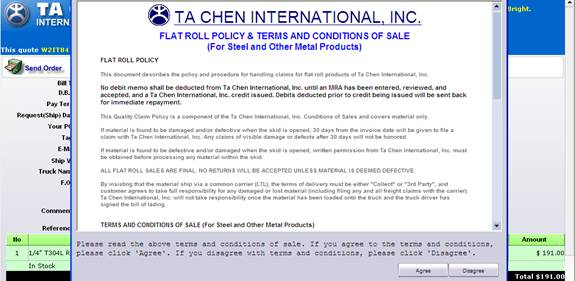
�P The system will then display a copy of the Terms and Conditions of Sale.
- Please hit ��Agree�� to agree to the terms and conditions, and continue confirming the quote
- If you choose ��Disagree��, the system will not confirm the quote and will take you back to the quote list
![]()
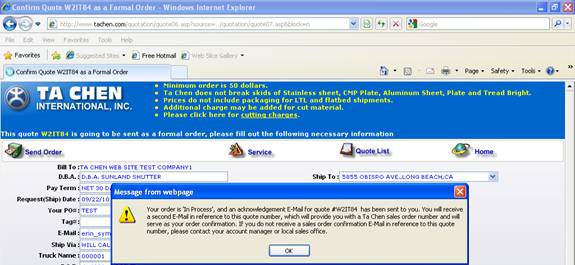
�P If you choose to ��Agree�� to the terms and conditions, the system will then state your order is in process, and that an acknowledgement E-Mail will be sent (see next page for an example).
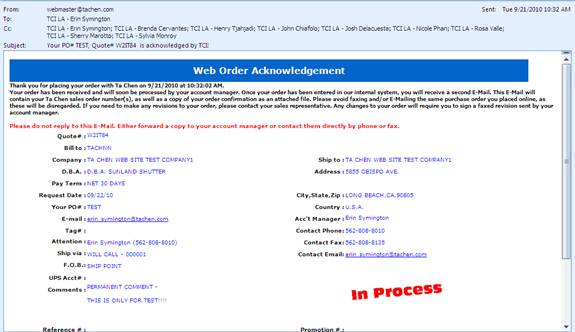
�P Confirmation E-Mail example.
�P Once the web order confirmation has been turned into a sales order, the system will send another E-Mail advising the sales order information (see next screen for an example).
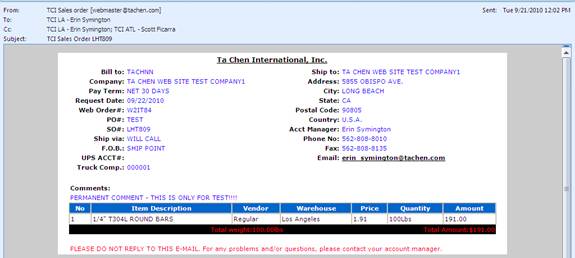
�P TCI Sales Order E-Mail example.
![]()

�P To get mill test reports, go to ��Request Mill Test Report��.


�P Select how you want to gather the mill test report information.
![]()
![]()
![]()
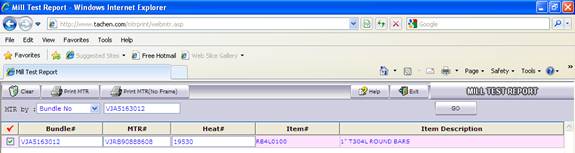
�P Enter the specific information in the field provided.
�P Hit ��GO��.
�P The system will state the MTR information.
�P Any item with a check mark in the first column will print the mill test report.
�P Choose how you want to print the information:
- Print MTR
- Print MTR (No Frame)
![]()
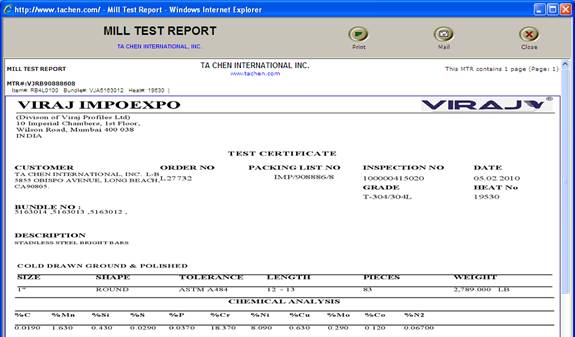
�P If you choose ��Print MTR��, the system will open a new window.
�P To print the information, choose ��Print��.

![]()
�P Select the printer from the list provided.
�P Hit the ��Print�� button.
![]()
![]()
�P The system will state to not close the window until the current printing job is finished.
�P Hit ��OK��.
�P Hit the ��Close�� button once the mill test reports have printed.
![]()
![]()
![]()
�P To E-Mail the mill test reports, hit the ��Mail�� button.
�P A new window will pop up.
�P Change the recipient and/or E-Mail address, if need be.
�P Enter any comments in the field provided.
�P Hit the ��Mail�� button.
�P The system will state the mill test report has been mailed successfully.
�P Hit the ��OK�� button (see next page for an example of the E-Mail).
�P E-Mail example
![]()
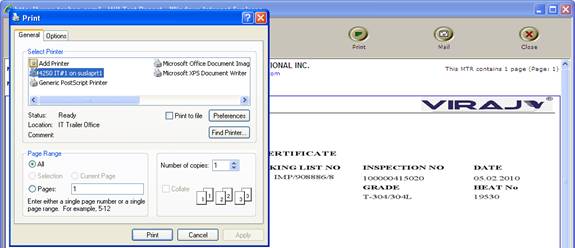
�P If you choose ��Print MTR (No Frame)��, the system will open a new window.
�P To print the information, choose ��Print��.
![]()


�P Select the printer from the list provided.
�P Hit the ��Print�� button.
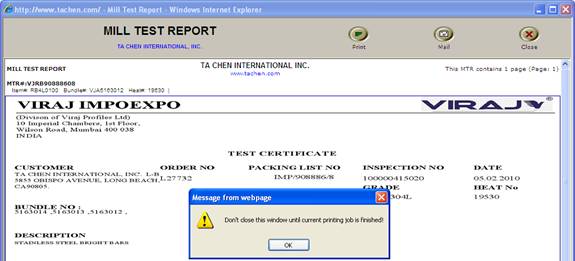
![]()
![]()
�P The system will state to not close the window until the current printing job is finished.
�P Hit ��OK��.
�P Hit the ��Close�� button once the mill test reports have printed.
![]()
![]()
![]()
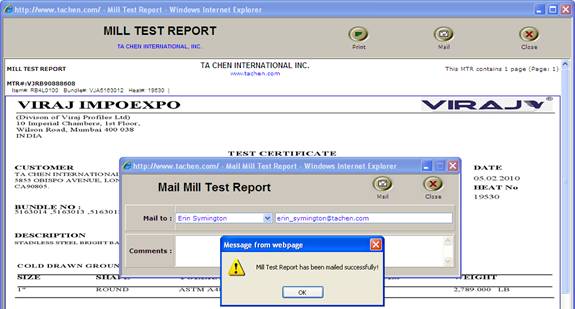
�P To E-Mail the mill test reports, hit the ��Mail�� button.
�P A new window will pop up.
�P Change the recipient and/or E-Mail address, if need be.
�P Enter any comments in the field provided.
�P Hit the ��Mail�� button.
�P The system will state the mill test report has been mailed successfully.
�P Hit the ��OK�� button (see next screen for an example of the E-Mail).
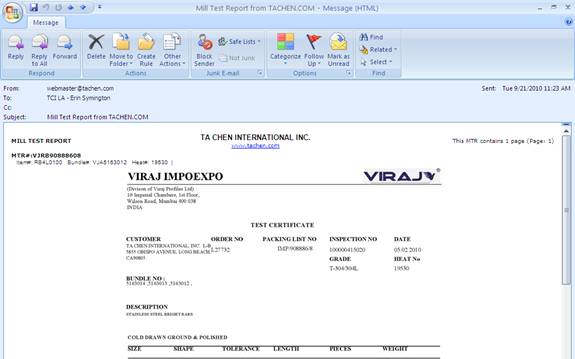
�P E-Mail example
![]()
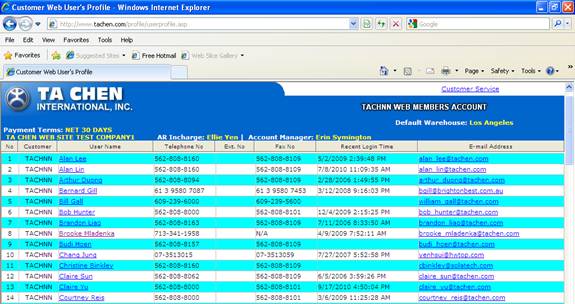
- To change information in your on line account, go to ��Personal Profile��.
![]()
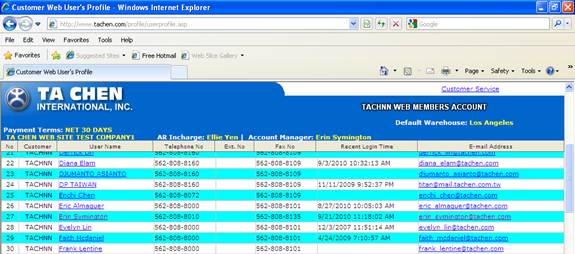
- To view and/or make changes to an on line account, right-click on the user name.
![]()
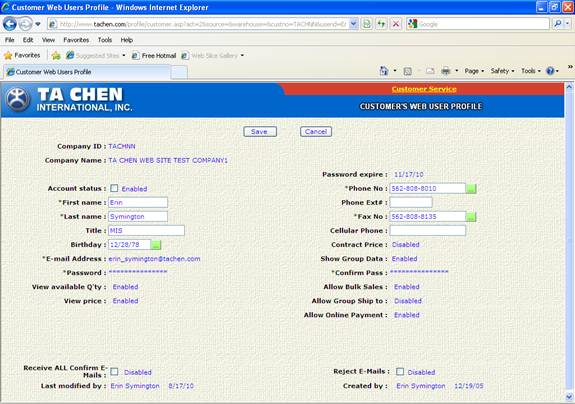
- View the information and/or make any changes to the on line account information.
- If only VIEWING the information, hit the ��Cancel�� button to return to the previous page.
- If changes have been made to the profile, hit the ��Save�� button.
![]()
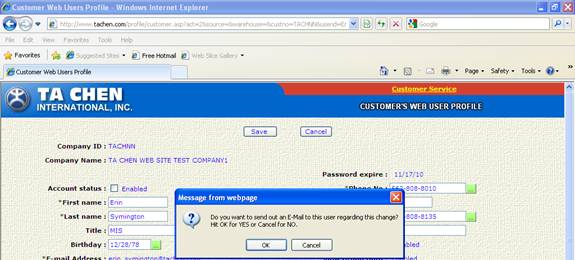
- The system will ask if you want to send out an E-Mail to this user regarding the change.
- Choose ��OK�� to send an E-Mail to the user
- Choose ��Cancel�� to not send an E-Mail to the user
![]()

- The system will then state the user��s profile has been saved successfully.
- Hit ��OK��.
![]()
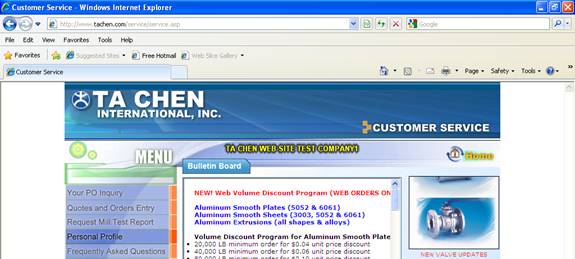
- Hit the ��Customer Service�� link to be brought back to the main customer page of the TCI web site.
![]()
![]()
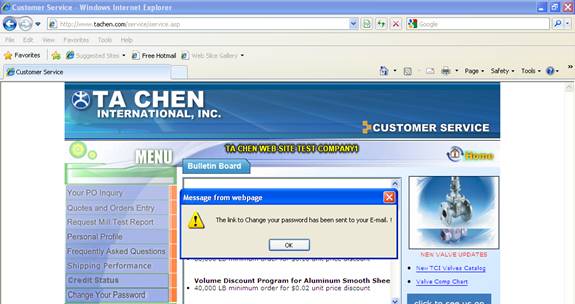
- To quickly change your on line account password, choose ��Change Your Password��.
- The system will then state a link to change your password has been sent to your E-Mail.
- Hit ��OK��.
![]()
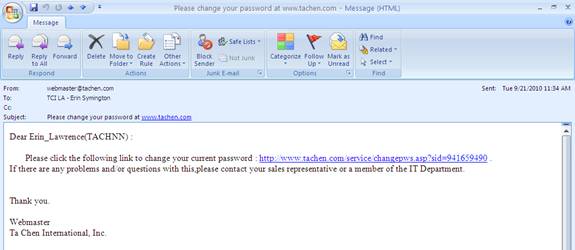
- Open the E-Mail and click on the link provided.

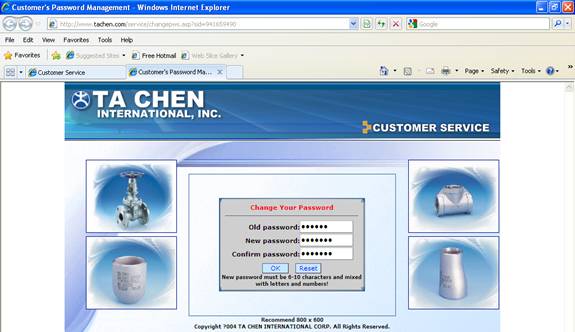
- The system will open a new web page.
- Enter your current password in the field provided.
- Enter your new password in the field provided.
- Re-enter your new password in the field provided.
- Choose ��OK�� to change your password information.
- Choose ��Reset�� to cancel the changes
![]()
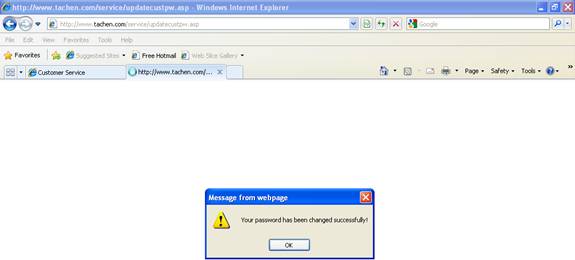
- If you hit ��OK�� to change your password, the system will state your password has been changed successfully.
- Hit ��OK��.

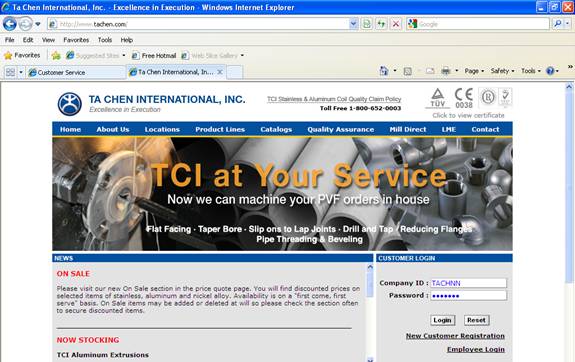
- The system will then take you to the TCI Home page, where you will be prompted to enter your company ID and NEW password to log into the web site.
![]()

- To view/print certificates, on the HOME page of the TCI web site, click the link in the top right-hand corner of the screen.
![]()
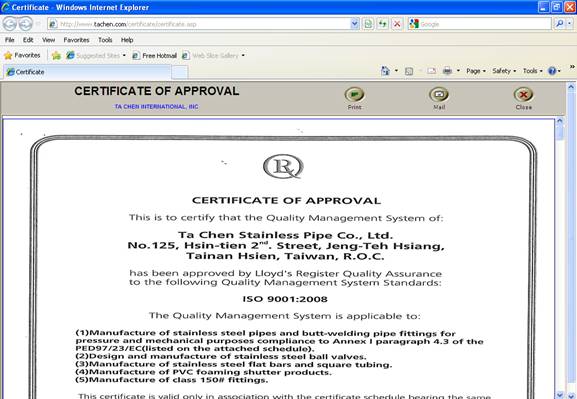
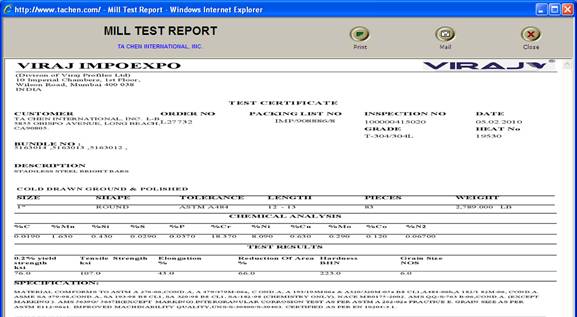
�P The system will open a new window.
�P To print the information, choose ��Print��.
![]()

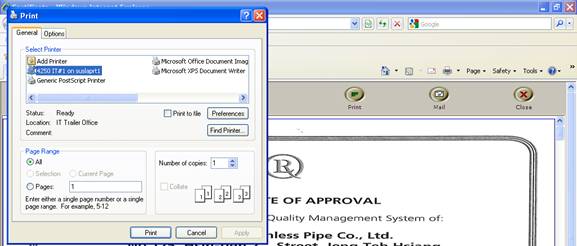
�P Select the printer from the list provided.
�P Hit the ��Print�� button.
![]()
![]()
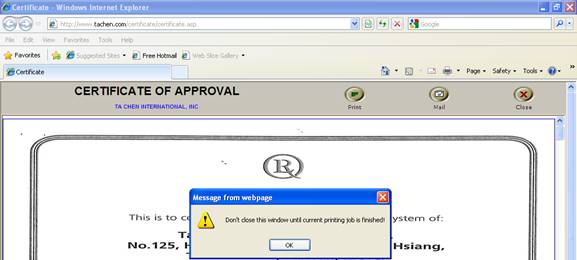
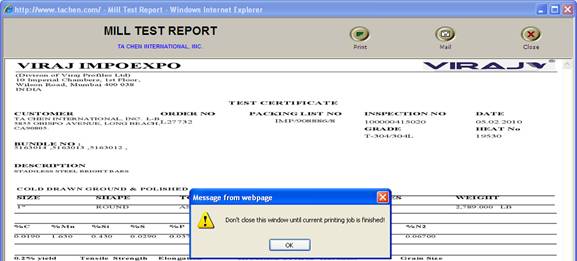
�P The system will state to not close the window until the current printing job is finished.
�P Hit ��OK��.
�P Hit the ��Close�� button once the mill test reports have printed.
![]()
![]()
![]()
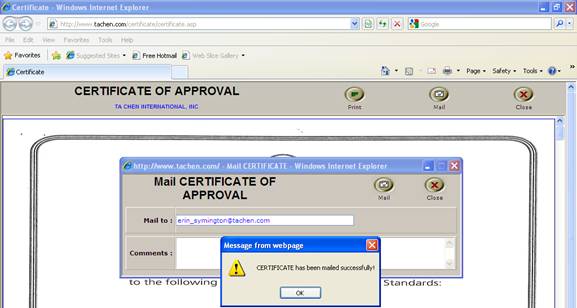
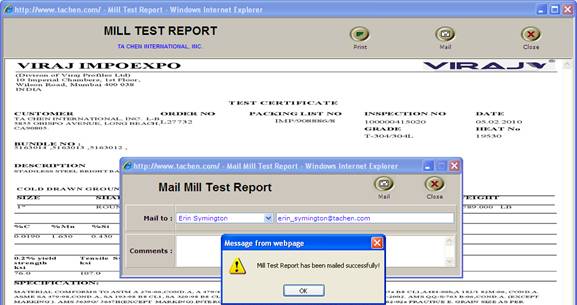
�P To E-Mail the mill test reports, hit the ��Mail�� button.
�P A new window will pop up.
�P Change the recipient E-Mail address, if need be.
�P Enter any comments in the field provided.
�P Hit the ��Mail�� button.
�P The system will state the certificate has been mailed successfully.
�P Hit the ��OK�� button (see next page for an example of the E-Mail).
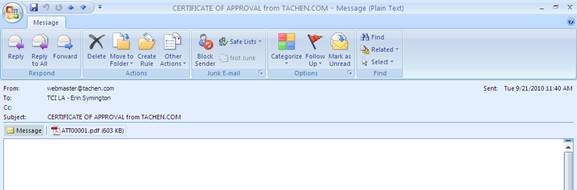
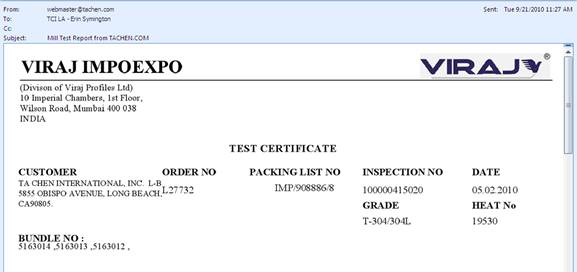
�P E-Mail example with the certificates as a .pdf attachment